Audio Cable Management Made Easy: 8 Pro Tips for Organization and Troubleshooting
Read Time: Approx. 16 min.

Your Guide to a Cleaner Sound (and Space)
Audio cable management. Not the most exciting topic, but it's an essential one for anyone who wants to keep their listening space clean, organized, and problem-free for as long as possible. At Moon Audio, we operate under the rule that your audio cables, whether instrument cables, microphone cables, or patch cables, are the most important link in your signal chain. Poor-quality cables can be what stands between you and exceptional hi-fi sound. When you're investing in high-end gear–like amplifiers, DACs, speakers, mixers, or synthesizers–expecting great results, every link matters. Think of it as the foundational work that allows your sound to truly shine. A little know-how helps, and you'll find that a well-organized setup isn't just about looking good; it's about performance and peace of mind. With proper care, even well-used cables can last decades!
Why Bother with Audio Cable Management?
You might be thinking, "Do I really need to spend time on this?" The answer is a resounding yes! While a clean aesthetic is a nice bonus, the real magic of good cable management happens behind the scenes. It's about proactive problem-solving, preventing issues before they even arise–whether that means routing your XLR cables safely around your rack gear or keeping power cords separated from analog signal lines to reduce interference.
There are many different tips and tricks to cable management, but we've identified 8 Pro Tips that will keep your sound clean and clear:
- Assess Your Needs
- Start with Quality Cables
- Label Everything
- Use Cable Management Accessories
- Properly Store your Cables
- Master the Over-Under Coiling Techniques
- Clean and Maintain Audio Cables Regularly
- Troubleshoot Systematically: The Process of Elimination
1. Assess Your Needs
Before you start buying new audio cables, balanced cables, or accessories for your setup, take time to assess your current system setup and needs. The biggest mistake in cable management is the "buy first, plan later" approach. Start by understanding exactly what you're working with and what you actually need.
Different audio environments will have different needs. Those building a home theater may require long speaker wire runs, while musicians and audio professionals often juggle guitar cables, mic lines, and patch cables. Same with mobile DJs and those working in shared production studios. The layout of your listening environment will determine whether you need to prioritize permanent routing solutions or flexible, clearly labeled cables with protective cases.
Inventory Your Current Setup
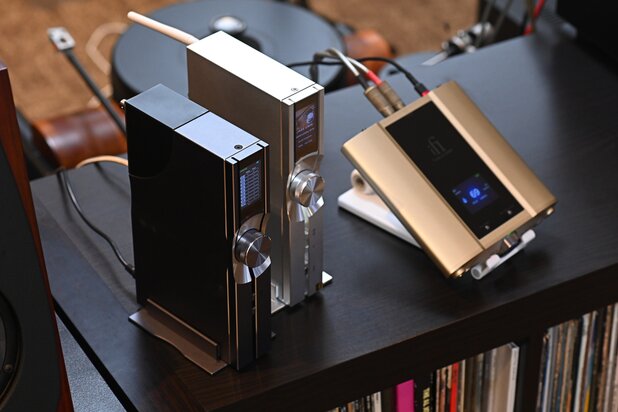
Walk through your entire hi-fi audio system and document every connection. Count how many XLR, TRS, TS, RCA, speaker cables, etc., you currently have. Note which ones are in active use versus gathering dust. Take photos of your current setup from multiple angles–you'd be surprised how useful these photos become when you're mid-reorganization and can't remember where that one cable originally went.
For the visual learners like myself, consider creating a spreadsheet or note with cable type, current length, condition, and current use. This will serve as an excellent point of reference down the road.
Measure Twice, Buy Once
You may have heard the phrase "Measure twice, cut once" referring to woodworking projects. Well, when it comes to hi-fi audio cables, we like to say "Measure twice, buy once." One of the most common mistakes audiophiles make is using a 25-foot cable for a 6-foot run. That extra 19 feet has to go somewhere, and that's how setups quickly become a tangled mess.
Measure each connection point and add what many seamstresses call "seam allowance," roughly 10% extra for routing flexibility and to avoid tension on connectors. For example, if your interface sits 5 feet from your studio monitors, a 6-foot cable is perfect. For permanent installations, measure the actual path the cable will take for the most accurate length. Will it go along the walls? Around a desk?
As your audio system evolves–adding a preamp, new pedals, or perhaps an additional streamer–so will your audio cable needs. What works now may not work forever, so before you invest time and money into various cable solutions and setups, anticipate any needs you may have in the future. If you're planning to add more gear, run extra cables now while you're in the thick of cable management. Dragon Audio Cables offers a comprehensive range of lengths and connector types, making it easy to standardize your cable inventory while planning for growth.
2.) Start with Quality Cables
Quality audio cables aren't just about great sound–they're about reliability, durability, and manageability. Cheap cables might save you $10 today, but they'll cost you hours in troubleshooting and premature replacements tomorrow.
Why Audio Cable Construction Matters
Revelation: not all cables are created equal. *Queue collective gasp.* We get asked all the time, "Do audio cables actually matter?" In short, yes. Materials matter. Better materials mean better performance and longer life, and sometimes the cable is the least important link in a manufacturer's production chain, but it's the most important link in your audio signal chain. To some manufacturers, they've become an afterthought, often constructed with subpar materials and little attention to detail.
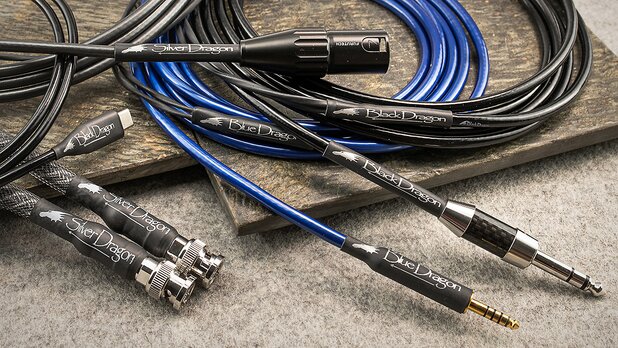
The high-quality materials used in premium cables can translate to several improvements, including better shielding, lower noise floor, natural dB boost, and overall improvement in clarity, soundstage, and definition of audio. Dragon Audio Cables are engineered with superior shielding, robust strain relief, and professional-grade connectors that resist the wear and tear of daily use.
When is it Time to Upgrade?
Think about upgrading your audio cable if you notice any of these issues:
- Sound Quality Issues: Persistent static, crackling, or a drop in audio quality could mean it’s time for a new cable.
- Visible Damage: Frayed, cracked, or damaged cables should be replaced to keep your headphones working their best and to stay safe.
- Want Better Audio: If you're serious about sound and want to hear every detail, a premium cable can make a real difference.
The Dragon Audio Cable Difference
- Conductors: This is the core of the cable, which is responsible for carrying the audio signal. Our connectors are made using the highest-quality UP-OCC silver or copper conductors that can be manufactured. UP-OCC (Ultra-Pure Ohno Continuous Casting) metals are void of impurities and are optimized for signal transfer and sound quality.
- Insulation: The material surrounding the conductors provides electrical isolation and reduces signal loss. Common insulation materials include Teflon (PTFE), polyethylene (PE), and PVC. For instance, in our Silver Dragon Headphone Cables, each conductor is encapsulated in a Teflon casing. The conductors are then surrounded by cotton and a thin layer of aluminum foil. It is then protected by a 100% coverage silver plated copper secondary shield and placed in a polyethylene jacket for further protection.
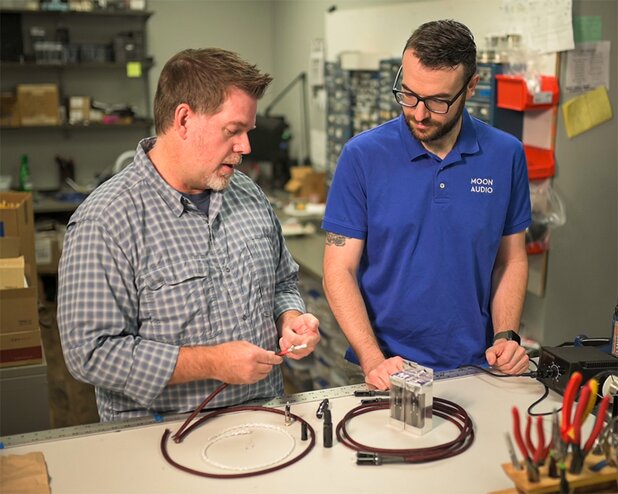
- Shielding: A layer of conductive material that encases the insulated conductors, protecting them from electromagnetic interference (EMI) and radio frequency interference (RFI). Shielding materials can include braided copper, aluminum foil, or a combination of both. Sometimes we double shield our cables for added protection if the application calls for it, like our Silver Dragon Premium Headphone Cable and Blue Dragon Power Cable.
- Connectors: The termination points of the cable, allow it to interface with audio components. High-quality connectors, such as gold-plated or rhodium-plated RCA, XLR, or 1/4" plugs, ensure a secure and reliable connection.
A $300 Dragon Audio Cable that lasts 10+ years costs you $30 per year. A $100 budget cable that fails in 2 years costs you $50 per year—plus the hassle of replacement and potential gig/session disruptions. Quality cables also maintain their resale value if you upgrade or change systems. Investing in durable, well-built audio cables is a no-brainer. When every last percentage point matters in your quest for the perfect sound, pinching a few pennies may be what stands between you and an exceptional listening experience.
3. Label Everything
If you've ever unplugged multiple cables at a time only to forget what connected to what, this tip alone will save you hours of frustration and headaches. Labeling isn't just for massive installations or the type-A cable organizer–even simple home systems benefit greatly from a solid labeling system.
There are several approaches to labeling systems that you can mix and match:
- Sound Quality Issues: Persistent static, crackling, or a drop in audio quality could mean it’s time for a new cable.
- Visible Damage: Frayed, cracked, or damaged cables should be replaced to keep your headphones working their best and to stay safe.
- Want Better Audio: If you're serious about sound and want to hear every detail, a premium cable can make a real difference.
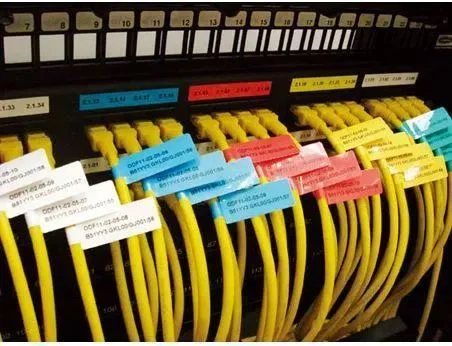
Creating an efficient labeling system doesn't stop at the act of labeling. Have you ever made a secret map and forgot to write down the key? Countless labels with no source of truth are a lot like a map with no key. If you choose to label your cables, make sure to inventory the connection points of each cable–what it connects from and what it connects to.
4. Use Cable Management Accessories
Fussing and fighting with audio cables is a shared experience among all audiophiles. We've all been there, and you might still be in the thick of it if you're reading this article. If you're avoiding the mess of tangled cables behind your equipment racks, it's time for some cable accessories. The right accessories transform cable management from impossible to effortless. Don't waste time fighting with your cables–give them the tools they need to behave.
The best accessories for your system will largely depend on your setup and the ergonomics of the space.
Velcro Cable Ties
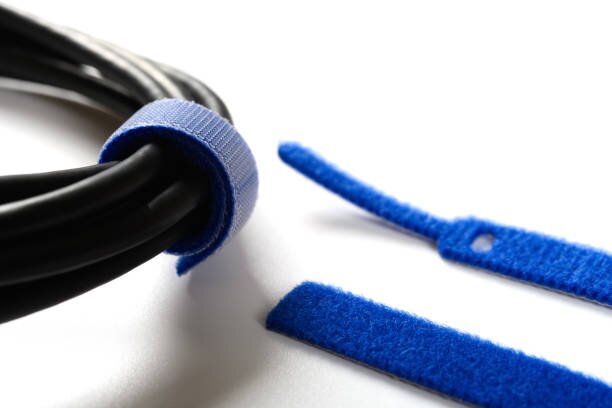
Velcro cable ties are the gold standard for audio cable management and should be your go-to solution. They can be reused hundreds of times without degrading, making them both economical and environmentally friendly. Unlike rigid fasteners, Velcro straps allow you to adjust tension so you don't accidentally crush your cables or damage the internal conductors.
Velcro straps are available in various lengths and colors, allowing you to color-code your cable bundles for easy identification. Not to mention, they're our favorite solution to headphone cables and IEM cables. Once that cable is coiled, secure it with the velcro strap, store it away, and pull it back out tangle-free for your next listening session.
Zip Ties–CAUTION: Zip ties have become a point of contention in the audiophile community, with some arguing they're better than velcro straps, and some believing otherwise. We generally don't recommend zip ties for cable management as they pose many risks to the integrity of your cables. Unlike Velcro straps, which attach to themselves, are reusable, and can easily be removed, zip ties are permanent. Every time you need to add or remove a cable from a zip-tied bundle, you must cut the tie, rearrange the cables, and install a new tie, making changes time-consuming and frustrating. But that's not even the most dangerous part. What happens if you accidentally cut the cable?! Talk about a nightmare waiting to happen.
If you absolutely MUST use zip ties, we recommend you take extreme caution when doing so. Only use them if you KNOW your audio application is permanent–They're single-use products after all. NEVER over-tighten them because they can crush the cable jacket and potentially damage internal conductors. And lastly, use the wider varieties specifically designed for cable bundling rather than the thin security ties meant for tamper-proofing.
Cable Channels and Raceways
Cable channels and raceway solutions are for those with large cable systems. Surface-mounted cable management systems create clean, professional-looking cable runs along walls (wall-mounted), under desks, or across ceilings, transforming visible cable chaos into organized infrastructure. Here are some common solutions:
- J-Channel and C-Channel Raceways: These are simple, affordable PVC channels that mount to surfaces using either adhesive backing or screws, depending on your needs and the permanence of your installation. They're perfect for running multiple cables together along baseboards, where they bend into architecture, or along desk edges. They come in various widths to accommodate different bundle sizes and can be painted to match your wall color for an invisible cable management solution.
- Wiremold: Similar to PVC channels, wiremolds are the heavy-duty raceway solution. They're a great choice for permanent installations in commercial or professional environments, as well as your home audio system.
- Cable Trays: Metal or plastic mesh trays that mount underneath desks using brackets or adhesive mounting systems. These trays allow cables to rest securely in the tray, making them completely invisible from normal viewing angles while keeping them accessible for changes or troubleshooting.
5. Properly Store Your Cables
There's nothing worse than coiling up a cable perfectly only to watch it unravel the second you place it down, and while the quick fix might be to twist each end of the cable into the coil, that does more harm than good. How you store cables when they're not in use determines how long they'll last. Proper storage prevents physical damage, keeps cables organized for quick deployment, and protects your investment.
Storing Headphone Cables
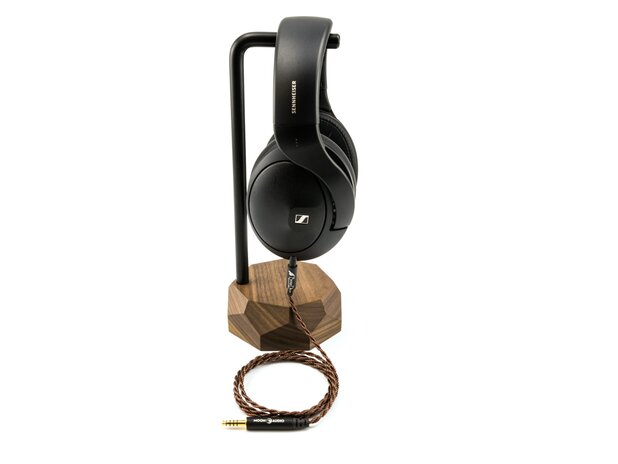
The number one failure point in cables is at the headphone connector. It's the part of the cable that gets the most action: Plugging in, pulling out, twisting, etc. Over time, with normal wear and tear, it's only natural that moving or disconnecting parts will degrade. Being mindful of the force being used and storing them in non-stressed positions will dramatically increase their lifespan.
Avoid cable wrapping into tight coils or knots. If you store your headphones on a stand for a short time, then there's no need to remove the cable, but you need to angle the headphones so the cable doesn't kink. When on the stand, fully retract the headband to prevent any additional tension on the ear cup from the headband. Tilt the cups forward also so that the attached cables are not resting on the table or bottom of the stand at a 90-degree angle. But if you’re going to store your headphones on a stand for an extended time, you should remove the cable.
If you're storing your headphones on a hanger, drape the cable over the headband and allow the cable to hang lower than the cups. This minimizes the stress and tension on the connectors. Always disconnect your cable before storing headphones in a box and never store cables with 90-degree bends.
If using Dragon Audio Cables, save your Moon Audio cable bag–It's great for storing your cables!
Climate Considerations
Various cable materials respond to environmental conditions differently. When storing cables, be conscious of:
- Temperature Extremes: Avoid storing cables in attics (extreme heat) or unheated garages (extreme cold). Temperature cycling makes cable jackets brittle and can affect internal conductor flexibility.
- Humidity: High humidity promotes connector corrosion. If you must store in humid environments, use desiccant packs in storage containers. Dragon Audio Cables' gold-plated connectors resist corrosion better than cheap nickel-plated alternatives.
- Sunlight: UV exposure degrades cable jackets over time. Store cables in closed containers or cabinets, away from windows and direct sunlight.
- Optimal Storage: Climate-controlled spaces (60-75°F, 40-60% humidity) extend cable life indefinitely.
6. Master the Over-Under Coiling Technique
If there's anything you take away from this article, let it be this tip! This single technique will revolutionize your cable management life. The over-under coiling method prevents cable memory, kinks, and twists that cause premature failure and tangled nightmares.
Kinks in audio cables are a sign of internal damage to the cable, like frayed or broken strands. They're a direct result of improper cable storage or usage. The wires inside are still susceptible to damage caused by bending or twisting, so anything you can do to minimize that over time is better.
Why Standard Coiling Fails
When you coil a cable in simple loops (all loops going the same direction), you're adding twist to the cable with every loop. By the time you reach the end, the cable has 10, 20, or more full twists in it. When you uncoil the cable, it retains this twist memory and springs into tangles.
Step-by-Step Over-Under Coiling Techniques
For headphone cables, we recommend a technique called the Over-Under method. This is especially useful for longer cables to prevent them from tangling when unwinding after storage. To do this:
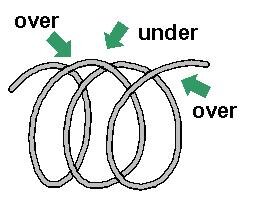
- Hold one connector in one hand (say your left hand)
- Let the cable hang naturally to identify which way it wants to curve
- Begin making your first loop in the cable's natural direction
- THE OVER LOOP: With your right hand, grab the cable about 18-24 inches from your left hand
- ring it up and OVER, creating a clockwise loop
- Place this loop in your left hand
- THE UNDER LOOP: Grab the cable again and give the cable a half-twist counterclockwise as you bring it toward your left hand
- The loop will naturally flip under, creating a counter-clockwise loop. Place the loop in your left hand.
- Repeat steps 4-6 (the over loop)
- Repeat steps 7-8 (the under loop). Over, under, over, under–maintain a consistent rhythm
- When you reach the end, wrap the Velcro strap around the coiled cable (not too tight!). The cable should form a neat, flat bundle that doesn't twist or spring open
The over-under technique feels a bit awkward for the first dozen cables you coil. It takes a bit of practice, but it protects the wiring inside from unnecessary twisting.
For IEM Cables, if there's a base pod, put it in the palm of your hand and slowly wrap the cable. For a regular IEM cable with a right-angle connector, put the connector between your ring finger and pinky, then wrap. And if there is no angle on the connector, place the connector in the palm of your hand facing you. Next, wrap the cable around your hand away from your body and coil the cable flat without twisting it. The cable should coil on itself in its natural looping pattern.
! What NOT To Do !
Mistake #1: Forcing the Cable: If the cable resists your coiling pattern, you're fighting its natural twist. Stop, let it hang, and start over, following the cable's natural preference.
Mistake #2: Inconsistent Loop Sizes: Varying loop sizes create an uneven coil that doesn't stack or hang well. Keep loops uniform, approximately 18-24 inches for most audio cables.
Mistake #3: Too-Tight Coils: Making loops smaller than 12 inches creates stress on the cable and can damage internal conductors over time.
How Dragon Audio Cables' Design Responds to Proper Coiling
High-quality cables like Dragon Audio Cables are engineered to be coiled repeatedly. The jacket material maintains flexibility without memory, and the internal conductor geometry resists twist-induced damage. Cheaper cables develop permanent kinks and twists even with proper coiling technique. After hundreds of coil/uncoil cycles, Dragon Audio Cables still deploy smoothly without tangles—a testament to superior construction that respects professional cable handling techniques.
7. Clean and Maintain Audio Cables Regularly
Preventive maintenance extends cable life and prevents mysterious problems down the road. Just a few minutes of regular care will save you hours of troubleshooting and hundreds of dollars in premature replacements.
Properly Connect and Disconnect your Cables from Audio Gear. First off, do not yank! To properly disconnect your audio cable, hold the cable close to the connector, not farther down. You should know it's a myth that disconnecting that cable will wear out the connector. But if your connector does wear out, our Cable Technicians here at Moon Audio can re-terminate the cable.
Clean Your Audio Jacks Regularly. Over time, dust and oxidation can degrade sound quality. Clean your audio jacks periodically with isopropyl alcohol and a microfiber cloth.
Try Not to Pull on Wires or Cables. Always unplug your audio cables by the connector, not the wire. This will eliminate stress on the internal wiring. You’ll experience less damage and better audio quality for years to come.
8. Troubleshoot Systematically: The Process of Elimination
When problems do arise, and they will eventually, you don't want to start turning off devices, unplugging cables, and breaking down your entire system until you know who the actual culprit is. Follow a methodical approach to identify issues quickly and accurately.
Common Symptoms Include:
- Constant low-frequency hum
- Intermittent or cracking signal
- Not signal at all
- Weak or thin signal
- Radio frequency interference (RFI)
1. Define the Problem Precisely: Don't just say "It's not working!" Be specific. Is there no signal at all or an intermittent signal? When did it last work correctly? What changes have occurred since then? Does the problem occur with all sources or just one?
2. Isolate the Problem Location: Once you've identified the potential problem, you can now break down the signal chain into segments, disconnecting the source device, cable(s), and destination.
3. Check Connections: 80% of cable failures are actually connection issues. Before you assume anything is broken, inspect connectors visually for obvious damage and firmly reconnect each cable. Perform a gentle "wiggle test" if needed to see if any intermittent problems reveal themselves, then power up the system and test it. Many "problems" are solved right here. Connectors can work loose from vibration, thermal expansion/contraction, or simple gravitational pull on heavy cables.
4. Test with Known-Good Cables: This is where maintaining a backup cable inventory really pays off. Having cables that you absolutely know are functional eliminates variables and gives you certainty rather than introducing new unknowns into your troubleshooting process. Start by swapping the suspect cable with a known-good cable of exactly the same type. Immediately after making the swap, test the system to see if the problem persists or disappears. If the problem continues even with your known-good cable, you've just eliminated the cable as the issue and can focus your attention on either the source device or the destination device. If the problem resolves completely, you've identified the original cable as faulty.
Verdict
Cable management isn't glamorous, but it's the foundation of reliable audio production. Whether you're tracking vocals at home, mixing live sound, or simply enjoying your favorite music over a small hi-fi system, these 8 tips transform cable management from an afterthought into an advantage. Be proactive, not reactive.
Good cable management saves time, prevents problems, and improves your audio quality for a more enjoyable listening experience. It's the difference between spending your session tracking down a problem versus focusing on the music. A perfect system doesn't happen overnight. Start with the tips that address your biggest pain points. Maybe that's finally mastering the over-under coiling technique, or organizing your cable storage system with a few velcro straps. Each improvement makes an instrumental difference, and within a few weeks, you'll wonder how you ever worked in cable chaos.
Dragon Audio Cables are engineered for both sonic excellence and ease of system management—making these practices even more rewarding. Explore our entire collection of audio cables to find the exact cables you need for your specific applications. From ultra-flexible headphone cables to high-quality XLR interconnects, Dragon Audio Cables offer the quality, durability, and variety to support any audio environment.
Related Videos
Digital Audio Cables & Analog Interconnects Explained
Caring for Your Dragon Cables to Ensure Longevity!
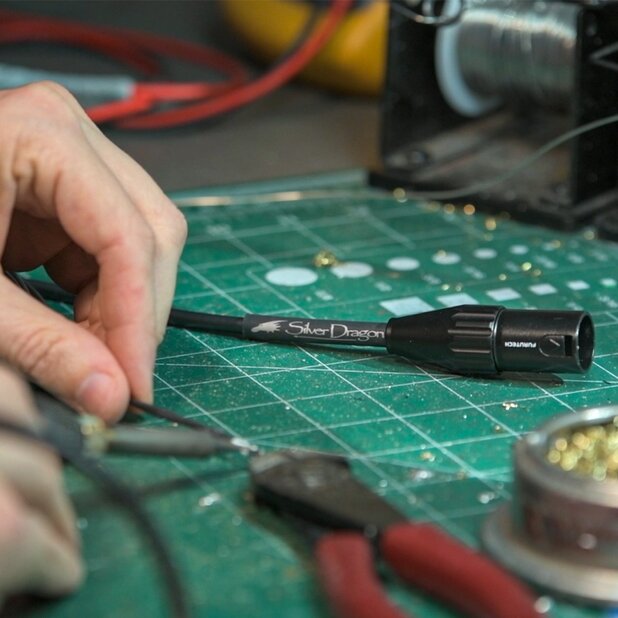
Custom Dragon Audio Cables: How It's Made

