IEM + Earbud After Care: Maintenance Tips for Best Sound Quality

TL;DR: Proper care and cleaning of IEMs and earbuds ensure sound clarity, hygiene, and longevity. Follow these steps and tips to preserve your audiophile-grade equipment and enhance listening quality.
Key Points:
- Importance of Cleaning: Prevents wax buildup that degrades sound quality and causes infections.
- Tools Needed: Soft brushes, microfiber cloths, isopropyl alcohol, and silica gel packs.
- Step-by-Step Cleaning: Includes workspace setup, cleaning external surfaces, and sanitizing components.
- Preventative Care: Store in dry cases, clean regularly, and avoid moisture or extreme conditions.
- Benefits: Maintains performance, extends lifespan, and improves overall audio experience.
When you invest in quality audio equipment, like IEMs and audiophile-grade earbuds, maintaining them is crucial. Clean equipment is key to enjoying the full depth and clarity they can offer. For audiophiles who value both their gear and sound precision, knowing how to clean earbuds isn’t just about hygiene. It’s also essential for preserving top-tier audio performance.
Over time, earbuds can accumulate ear wax and other debris. This wax can muffle sound, disrupt clarity, and even shorten the life of your equipment. If you want to get the most out of your investment, you need to learn how to clean and maintain your IEMs or earbuds.
In this guide, we’ll walk you through effective cleaning methods to keep your earbuds in peak condition. Keep reading so you can continue to experience sound at its best.
Why Regular Cleaning Is Essential
Your earwax has an important job. Its role is to protect your inner ear from external bacteria and debris. The right amount of earwax successfully helps protect a delicate and easily infected part of your anatomy.
With that said, earwax is essentially a depository for germs, dead skin cells, dust, and external moisture. It’s not particularly hygienic. If you have excessive earwax, and it’s pushed deeper into your ear canal, it can cause infections instead of protecting you from them. Those with too much earwax, or compressed earwax, tend to experience pressure, pain, and general discomfort.
That’s bad news for dedicated audiophiles. You only get one set of ears in your lifetime. Repeat infections can cause eardrum damage and hearing loss, diminishing your audio enjoyment for life.
And what, you may ask, causes infection-causing earwax to build up?
According to audiologists, the number one culprit is inserting foreign objects into your ears. However, they aren’t referring to the occasional Q-tip. Prime examples of foreign objects include earbuds and IEMs, which audiophiles use regularly. Yikes.
Why Ear Wax in Headphones is a Problem
While ear buds and ear wax go hand in hand, they’re not exactly a classic combo. Wax muffles sound and diminishes audio quality — or, to put it simply, you can’t hear as well with gunk in your ears!
The buildup of excess earwax impacting your health and hearing is quite bad by itself. However, it can also negatively impact the audio quality of your buds and monitors.
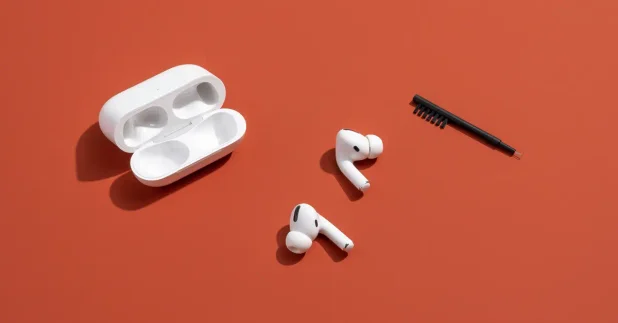
Getting ear wax in your headphones can degrade delicate audio components. It can clog membranes and tubing filters in your earbuds and IEMs. Over time, that may cause a reduction in audio clarity and volume.
All that to say, knowing how to clean earbuds is a critical skill for the discerning and conscientious audiophile.
Pro Tip: Start with Good Ear Hygiene
Before focusing on learning how to clean ear wax out of earbuds, you should learn how to clean your ears properly. Maintaining clear ear canals is a proactive preventative measure. It prevents pain and infection and can preserve your hearing. It also means you won’t have to clean your earbuds and IEMS as often.
You may wish to consult a doctor or audiologist for tips on managing earwax buildup from headphone use. Often, they can professionally remove excess wax in the office (which is very satisfying). After that, they’ll give you an appropriate ear-cleaning routine to use at home.
Tools You Need for Cleaning Earbuds and IEMs
Your earbuds and IEMs are a major investment. While cleaning your earphones’ ear wax is important, the right tools are crucial. If you start jabbing things with needles or get moisture in the wrong filter, you may end up with a bigger problem.
Protecting your earbuds and IEMs means choosing the least invasive cleaning methods and materials possible. Avoid sharp objects, if possible. Ideally, you won’t need to introduce any wet cleaning solutions at all.
Tools we recommend include:
- Soft brush (like a small paintbrush, soft toothbrush, or specialized electronics brush)
- Microfiber cloth
- Cotton swabs
- Cleaning solution (isopropyl alcohol diluted to safe levels)
- Canned air
- Drying tools (like silica gel packs)
- A small tray where you can keep loose components
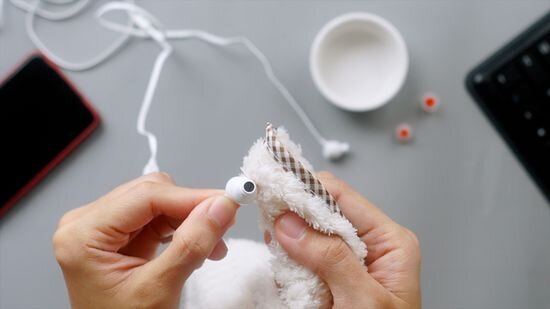
You may not need all of these. You’ll also find that some tools work better for your specific earbuds or IEMs than others.
If you find your earbuds or IEMs are very dirty, we recommend looking into replacement parts vs cleaning them. The risk of potential damage is otherwise too great. Or, to put it bluntly, it’s probably not worth it!
Step-by-Step Guide: How to Clean Earbuds and Remove Ear Wax
While all earbuds and IEMs are unique, you can follow a few basic steps when cleaning them. As always, use your best judgment when following these tips. Additionally, this advice is specifically for cleaning ear wax out of earbuds and IEMs. If you are clearing other debris, you may wish to consult a technician.
Step 1: Prepare Your Workspace
Set up your materials on a well-lit, flat workspace. Choose a spot where you can easily see small components and avoid losing them.
You may want to cover the work surface with a soft, lint-free cloth or towel. That helps to prevent scratching or damaging your earbuds or IEMs. It also helps if the cloth is a contrasting color. It can help small components stand out, making them easy to spot.
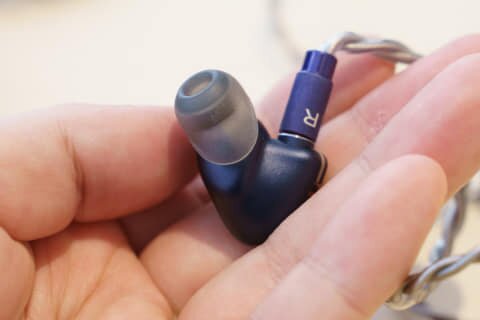
Step 2: Detach Removable Tips or Filters
Your earbuds or IEMs may or may not include removable tips, ear hooks, or filters. It’s often these small, intricate, removable parts that get bogged down with ear wax and other grime. If you’ve never removed them before, we recommend referring to your product manual or manufacturer’s guidelines.
We recommend placing any small, removable parts into a tray while you work. While you can place them directly on your work area, little components sometimes get dropped or skitter off surfaces. It’s much harder to find them on the floor! Using a tray with a lip can keep them contained and accessible.
Step 3: Clean Outer Surfaces
Use a dry microfiber cloth to wipe the exterior of your earbuds or IEMs gently. Focus on areas where wax typically builds up, like edges and seams.
If wax is stubborn, you may use a very careful, conservative dab of diluted isopropyl alcohol. Apply alcohol to exterior components only. Absolutely avoid getting any moisture into the openings or sound ports.
Also, be sure to maintain a light touch. If you aren’t careful, you may end up pressing debris further into the device. That can make it harder to extract and damage internal components.
Step 4: Ear Wax Removal
After cleaning surfaces, you may need to use other tools to dislodge earwax. Use a soft brush to gently dislodge wax from mesh or other small crevices. You can also use a cleaning brush designed for earbuds.
Hold the earbuds or IEMs upside down and gently sweep the brush over the mesh or sound ports. That ensures the debris fall down and away from the device.
At this stage, some audiophiles introduce canned air. Introduce canned air cautiously and only if wax is stubbornly lodged in mesh or sound ports.
We recommend keeping the nozzle of the canned air at least 6-8 inches away from the earbuds. That helps you avoid forcing ear wax further into the device. Use short, controlled bursts of air to prevent excessive pressure.
We only suggest using canned air on delicate, expensive earbuds or IEMs if you’ve used it before. It can be very easy to make a mistake and introduce the liquid propellant to your earphones. To prevent this costly error, make absolutely certain that the canned air nozzle is not tilted or shaken during use.
Step 5: Clean Rubber Tips and Surfaces
Once the main components are clean and free of ear wax, you can focus on the removable components you set aside in step one. It’s typically safe to use a diluted isopropyl alcohol solution on these components. Since ear tips come in close contact with your inner ear, it’s also a good way to sanitize them and prevent infection.
Dip a cotton swab lightly into the solution and ring out excess moisture. You should avoid oversaturating the swab to prevent liquid from entering the internal components. Use the swab to gently clean the silicone or foam tips, ear hooks, and filters.
If components don’t look like they require cleaning, leave them alone. The less moisture you introduce to your electronics, the better.
Step 6: Let Components Dry Completely
To complete the process, place all cleaned components on a clean, dry surface in a dust-free environment. Allow them to air dry for a minimum of one hour, but longer is often better.
While it can be tempting to speed up the process, avoid direct heat sources like blow dryers. Heat causes expansion and can damage certain components. You may wish to introduce silica gel packs, which wick moisture and can ensure your earbuds and IEMs dry completely.
Do not reassemble your earbuds or IEMs until you are confident every component is completely dry. You don’t want to risk introducing moisture into your audiophile-grade electronics. However, once dry, you’re safe to reassemble and use your earbuds or IEMs!
Maintaining Sound Quality: Tips for Long-Term Care
The best way to care for your earbuds or IEMs is to take preventative steps to keep them clean. This can help you maintain your investment in high-quality, audiophile-grade earphones.
First, review our tips on prioritizing ear hygiene above. Then, follow these tips:
- Store earbuds and IEMs in a clean, dry case to avoid dust and moisture buildup.
- Periodically clean your case to avoid transferring dirt or debris back onto your earbuds.
- Wipe down your earbuds or IEMs with a dry microfiber cloth after each use.
- Always handle your earphones by the housing, not the cable, to avoid putting strain on connections.
- Regularly replace your ear tips if they start to lose shape or comfort.
- Refrain from exposing earbuds to extreme temperatures, which can damage electronic components.
- Avoid wearing your IEMs or earbuds in heavy rain or during intense workouts unless explicitly rated for water resistance.
- During periods of high humidity, store your earbuds with a small silica gel packet to absorb excess moisture.
- Replace your filters if they become clogged (and your model allows it). Use only manufacturer-recommended replacements.
Benefits of Proper Maintenance for IEMs and Earbuds
Ultimately, consistent cleaning preserves sound clarity, improves hygiene, and maximizes the lifespan of your earbuds and IEMs. Over time, cleaning ear wax out of headphones can even preserve your health and hearing. Your music will sound clearer, and you’ll be able to enjoy your favorite tracks for years and years to come.
Don’t underestimate the value of the simple aftercare tips and routines outlined above. Something as simple as wiping down your earbuds after use takes a few seconds. Even so, it can save you tons of time and money down the line. Likewise, it’s much cheaper to pick up a good case and microfiber cloth than to replace your audiophile-grade IEMs.
The bottom line? Good habits save you cash, boost performance, and enhance comfort.
Is It Time for a Fresh Pair of Earbuds or IEMs?
Keep your earbuds in top shape! In the market for a new pair? Explore our collection of IEMs and earbuds at Moon Audio.


